Hello, dear COS, ECE, and SLS Faculty! We’re excited to support you as we transition from Moodle to Canvas, our new Learning Management System (LMS). This page is your one-stop shop for everything you need to make this change as smooth as possible.
For the Spanish version of this page, please visit this link.
Before you begin, we strongly recommend getting acquainted with the Canvas environment.
The best way to start is by watching the official “Canvas Overview Video” for a quick overview, as well as reading this page from top to bottom. We also recommend to read the “Canvas Basics Guide”. If you prefer a deep dive, please explore the “Canvas Instructor Guide”.
For a more in-depth experience, you have been automatically enrolled in “Growing with Canvas,” an official self-paced course. While completing it is optional, we highly encourage you to go through its modules to become fully comfortable with the platform. You will be able to find it on your Dashboard starting on mid July 2025 or earlier. Stay tuned! If you prefer the Spanish version, please request enrollment writing to cos@garrett.edu
To access our Canvas instance, go to garrettets.instructure.com and login using your Garrett account! You’ll be asked about this on the discovery page. See screenshot below.
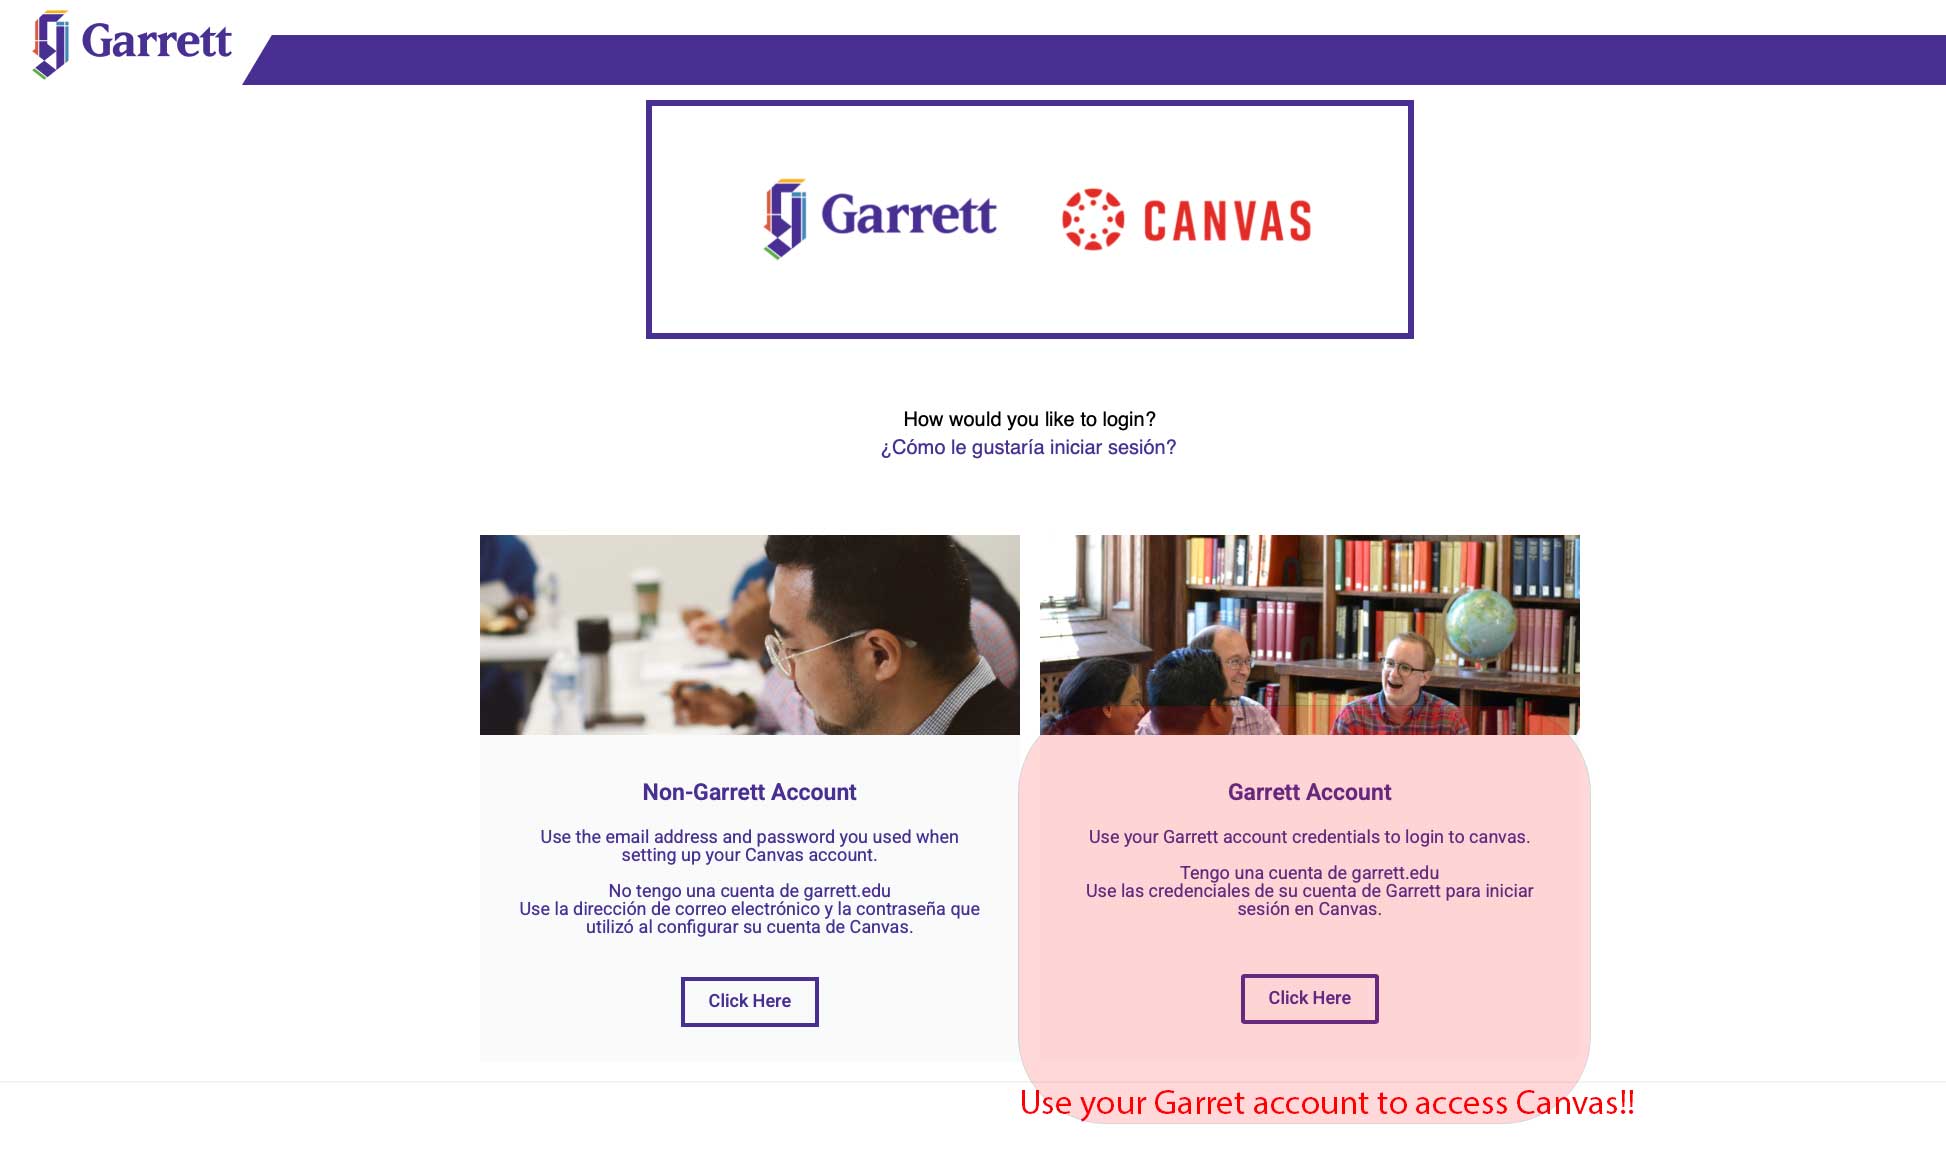
Remember that if you have a personal or work Microsoft account different from Garrett, you will need to either use a different browser or log out from that other account before logging into your Garrett account.
For logging into your Microsoft 365 Garrett Account, go here. We use that account as a single sign-on for Canvas and any other tool.
In case the course you are going to teach is not yet available in Canvas, we recommend that you use your sandbox course to practice or get use to the platform, which should be available on your dashboard.
Canvas lets you personalize the interface by choosing from a variety of supported languages—from Spanish and French to Chinese, Arabic, and more. If you’d like to switch to any other language. Follow the step‑by‑step instructions here:
If you need personalized help learning how to use Canvas or any other of our ed-tech tools, please contact José Delpino at jose.delpino@garrett.edu
If you need support with any technical issues related to our technology stack, accounts, etc., please contact both IT (technology.support@garrett.edu) and José Delpino (jose.delpino@garrett.edu) with details about your problem. We will be happy to help you as soon as possible.
If you taught courses before on COS, ECE or SLS programs, you older course should have already been migrated to Canvas by our IT team.
If you haven’t taught before with us and need to import an external course, please refer to the following guides, depending on the LMS you are coming from:
After importing your course, it’s always a good idea to review the content to ensure everything has transferred correctly. Independently of the method you are using, compatibility is never perfect, and you might encounter several kinds of issues when migrating content from one LMS to another.
After importing, we strongly recommend that you carefully review all your content, especially complex elements like quizzes and interactive activities, to ensure they’re functioning correctly in Canvas.
You will fins more help about that in page! Keep reading!
Importing quizzes from Moodle can sometimes be challenging, as not all Moodle question types have a direct equivalent in Canvas.
While Moodle and Canvas have many similar features, the terminology and layout can be different. This equivalency table will help you understand the key differences:
| Feature/Concept | In Moodle | In Canvas |
| Course structure | Topics or Weekly blocks | Modules |
| Course homepage | All content displayed on one page | Content organized in separate areas (Modules, Assignments, Discussions, etc.). The “Modules” section only contains what you manually add there. We recommend using the “Modules” section as the default entry point for your course in COS, ECE, and SLS. |
| Assignment submission | Assignment activity | Assignment |
| Discussion forums |
Forum activity | Discussion |
| Quizzes | Quiz activity | Classic Quizzes or New Quizzes |
| Grading interface | Grader report | SpeedGrader |
| Gradebook | Gradebook with categories | Gradebook with assignment groups |
| Content pages | Page resource | Page |
| File management | Files in each section | Centralized files repository for each course |
| Student view | “Switch role to…” student | “Student View” Button |
| Communication | Messaging system | Inbox (Canvas Conversations) |
| Calendar | Calendar block | Calendar |
| Groups | Groups with groupings | Groups with sections |
| Course completion tracking | Activity completion | Module requirements and prerequisites |
The most significant conceptual shift from Moodle to Canvas is how a course is structured:
Here are a few Canvas features that are particularly noteworthy for instructors coming from Moodle, with links to the official guides:
Canvas provides separate, dedicated mobile apps for instructors and students, so it’s important to download the correct one.
As an instructor, you will use the Canvas Teacher app. It is a robust tool specifically designed for course management on the go, allowing you to grade assignments with SpeedGrader, communicate with students, update content, and post announcements.
Your students will use the separate Canvas Student app, which is tailored for them to view course materials, submit assignments, and check their grades. Be sure to advise your students to download the “Canvas Student” app to avoid any confusion.
To download the Canvas Teacher app use the following link depending on you mobile operating system:
![]()
When your Moodle course is imported into Canvas, you will notice two things about your course’s structure. Understanding how your old content and our new template work together is your first step in organizing your course.
The structure you used in Moodle (e.g., “Week 1,” “Week 2,” or “Topic 1,” “Topic 2”, or any other variation) is preserved. Each of those weekly or topical sections from Moodle has been converted into its own Module in Canvas. All the files, links, and activities from that Moodle section should be located inside the corresponding Canvas Module.
In addition to your imported modules, you will also find a pre-built, empty module named “Unit 1: [Title or Theme Here].” This is a pedagogical template provided by the institution to suggest a best-practice structure for organizing learning activities. However, such as framework is completely options for COS, ECE and SLS courses.
You have two options for organizing your course.
Option 1 (Recommended for a Smooth Transition): Stick with Your Original Format. For your first time teaching in Canvas, we strongly suggest you stick with the original format that was imported from your Moodle course. This allows you to focus on cleaning up your content without having to completely restructure it. Your steps:
Option 2 (Advanced): Adapt Your Content to the New Unit Format. If you are comfortable with Canvas, have enough time, and want to adopt the new pedagogical framework, you can move your imported content into the unit structure. This is a more time-consuming process, because it could require content tweaks. Your steps:
After importing a course from Moodle, your quizzes require a manual check-up to ensure they work correctly in Canvas. Follow these steps to clean and verify your quizzes.
For all file-based video content in your Canvas course—whether it’s a pre-recorded lecture, a weekly welcome message, or a demonstration—we use Yuja.
Yuja is our institution’s integrated video platform that allows you to record, store, caption, and share videos directly within Canvas. It is the recommended and supported method for all video management, as it is fully accessible and integrated with our Gradebook.
If you have link to video already on Youtube, Vimeo or other platforms, you can just embbed the video irectly into Canvas:
All of your video tasks can and should be completed directly within Canvas. This avoids the need to install extra software and makes managing your content much easier. The primary tool you will use is the Yuja Media Chooser, which is available in the toolbar of any Canvas content editor (on a Page, Assignment, Announcement, etc.).
When in doubt, the official Canvas documentation is the best place to find answers.